Beginner’s Guide to Basic Home Repairs

So you’ve moved into your first home, and you’re feeling proud and excited. But then, the first minor disaster strikes—a leaky faucet, a loose doorknob, or a crack in the wall. Don’t panic! With a few basic tools and a bit of know-how, many common household issues can be tackled without calling in the pros. This beginner’s guide will give you the confidence to take on some simple home repairs and save you both time and money.

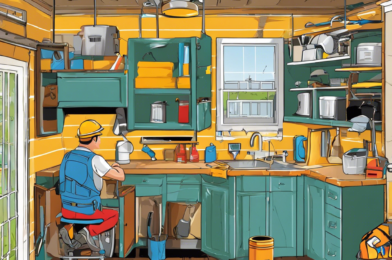
First, let’s talk about the essentials: having a well-stocked toolbox. You’ll need a basic set of tools like a hammer, screwdriver (both flathead and Phillips), pliers, an adjustable wrench, a tape measure, and a level. These tools will come in handy for a variety Pliers will be your go-to for gripping and bending, while an adjustable wrench can handle various bolt and nut sizes.

Now, let’s tackle some common issues. A leaky faucet, for instance, often just needs a simple washer replacement. Turn off the water supply, disassemble the faucet, replace the washer, and you’re done! A loose doorknob might require tightening the screws or replacing the tube latch, both straightforward tasks. For cracks in the wall, fill them with spackling compound, let it dry, then sand it smooth before painting.

Basic home maintenance is all about being proactive. Regularly check your home for potential issues. Look for water stains on ceilings or walls, which could indicate a leak. Inspect gutters and downspouts for debris, ensuring they’re clear to prevent water damage.

How to Keep Your Home Clean and Organized

# Keeping Your Living Space Sparkling and Tidy: A Guide to Home Organization

Maintaining a clean and organized home is a rewarding endeavor, offering comfort, efficiency, and even a boost in mental well-being. With a few practical tips and a touch of creativity, you can transform your living space into a haven of tranquility and order. Let’s explore some effective strategies to achieve a cleaner and more organized home.

Start by creating a daily cleaning routine. Consistency is key to keeping your home tidy. Allocate a few minutes each day to basic tasks such as wiping down surfaces, vacuuming high-traffic areas, and tidying up clutter. This routine can be as short as 15 minutes daily and will make a significant difference in maintaining a clean home. Set a timer if needed to stay focused, and soon enough, these tasks will become second nature.
#### Daily Cleaning Checklist:
– Wipe down kitchen countertops and sink.
– Sweep or vacuum entryways and living room.
– Make the beds and tidy bedrooms.

Next, tackle clutter to create a sense of openness and calm. Designate specific areas for items prone to causing clutter, such as mail, keys, and accessories. Utilize decorative bowls or trays to corral these items, ensuring they have a home when not in use. Regularly go through these collections, discarding or donating items you no longer need. This process will prevent clutter buildup and maintain a pristine environment.

Organize your belongings by assigning everything a designated place. For items like books, clothing, and kitchenware, use storage solutions like baskets, shelves, or cabinets. Label storage containers to make finding things easier and encourage family members to return items to their proper places. Efficient organization saves time and reduces stress when locating belongings.

DIY Furniture Makeovers: Upcycle Old Pieces

Breathe new life into your dated or second-hand furniture and create unique, personalized pieces for your home with DIY makeovers. Upcycling is a fun and cost-effective way to refresh your space while reducing your environmental impact. With a little creativity and some simple techniques, you can transform old furniture into statement pieces that reflect your style. Whether you’re a seasoned crafter or a beginner, there’s a furniture makeover project for you. Here’s how to get started on your DIY journey.

The first step is to scout for pieces that have potential. Visit thrift stores, garage sales, or online marketplaces like eBay and Facebook Marketplace. Look for items with interesting shapes, sturdy construction, and a price tag that won’t break the bank. Keep an open mind; even the most unassuming piece can become a gem with the right treatment. Consider the item’s intended purpose in your space and visualize how it could be transformed.
– For instance, an outdated wooden dresser could become a stylish TV stand with a fresh coat of paint and new hardware.
– A worn-out coffee table might be revived with a decoupage finish featuring your favorite vintage maps or botanical prints.

Once you’ve chosen your furniture, it’s time to plan your makeover. Decide on a color palette and design elements that suit your personal taste and the room’s decor. Think about whether you want to go for a bold, modern look or a more subtle, classic style. There are countless techniques to choose from, such as painting, staining, decoupage, or refinishing.
For example, a popular and beginner-friendly method is chalk painting, which provides a beautiful matte finish and requires minimal surface preparation.

Gather your materials and get to work. Sanding, cleaning, and preparing your furniture properly will ensure the best results. Follow the instructions for your chosen technique, and don’t be afraid to experiment. With upcycling, the beauty is in the individuality of each piece, so have fun with it!

How to Install Shelves to Maximize Space

Looking to make the most of your wall space and add some extra storage? Installing shelves is a fantastic way to maximize your room’s potential, providing functional storage solutions without compromising on style. Whether you’re a DIY enthusiast or a beginner, this step-by-step guide will help you achieve a professional-looking result. Get ready to transform your living space and embrace the satisfaction of a successful shelving project!

Before you begin, gather the necessary tools and materials. You’ll need a tape measure, a level, a pencil, a stud finder, a drill, screws, wall anchors, a carpenter’s square, and of course, the shelves themselves. Ensure your shelves are suited to the weight you intend to place on them, opting for sturdier materials if required. From classic wooden shelves to sleek metal ones, there’s a style to suit every home and taste.

Start by determining the desired height for your shelves. Use a pencil and a level to mark the wall, ensuring the line is straight and level. This step is crucial for achieving a professional finish. Next, use your stud finder to locate the wall studs, marking their positions. You’ll want to drill your screws into the studs for a secure fit. If you can’t hit a stud, use appropriate wall anchors to ensure your shelves can support the intended weight.

Now it’s time to drill. Using the marks you’ve made as guides, drill holes for your wall anchors or directly into the studs. Ensure your drill bit is appropriate for the type of screw you’re using. After drilling, insert the wall anchors if necessary, leaving a small portion exposed for the screws to bite into.

Simple Ways to Improve Your Home’s Curb Appeal

Enhancing your home’s curb appeal is a fantastic way to boost its overall value and make a great first impression. Whether you’re preparing to sell or simply want to spruce up your property, there are numerous easy improvements you can make without breaking the bank. Here are some simple yet effective ideas to transform your home’s exterior:

1. **Start with a Clean Canvas:** Give your home a fresh look by power washing the exterior walls, sidewalks, and driveway. Removing dirt, grime, and mildew can instantly brighten up the entire property. A clean exterior also ensures that any subsequent improvements you make will have a more significant impact. Don’t forget to trim overgrown bushes and trees to maintain a tidy appearance.

2. **Revitalize Your Front Door:** The entry door is a focal point of your home’s facade. Consider giving it a fresh coat of paint in a color that pops and complements your home’s style. Update the hardware with stylish options like a new handle and a decorative knocker. A wreath or seasonal decoration on the door adds a warm and inviting touch.

3. **Enhance Lighting:** Proper lighting can make your home feel more welcoming and secure. Install stylish outdoor wall sconces on either side of the front door to illuminate the entrance. Solar-powered pathway lights are an energy-efficient way to highlight walkways and garden beds. For added charm, hang a string of fairy lights along the porch railing or around windows.

4. **Add Greenery:** Plants and flowers bring color and life to your home’s exterior. Create vibrant flower beds along the front walkway or porch, using a mix of annuals and perennials for year-round interest. Potted plants or hanging baskets can also add a vibrant touch to your porch or front steps. Choose low-maintenance options if you prefer an easy-care garden.

These initial steps are just the beginning of transforming your home’s curb appeal. Stay tuned for the next installment, where we’ll explore additional creative ideas to elevate your home’s exterior design and make it stand out from the rest.

Tips for Creating a Stylish Home Office Space

Transforming a dull home office into a stylish and productive haven is an exciting endeavor! Creating an inspiring workspace might seem like a daunting task, but with a few simple tips, you can design an office that reflects your personality and boosts your productivity. Say goodbye to boring walls and hello to a workspace that sparks creativity!

First, choose a color palette that sets the mood. Opt for colors that not only inspire and motivate you but also complement your existing decor. Consider painting a feature wall or adding an accent color to create a focal point in the room. For instance, a deep emerald green or a rich burgundy can add a touch of elegance and sophistication to your space. Incorporate these colors through paint, wallpaper, or even furniture choices. The right colors can instantly transform the ambiance of your office.

When it comes to furniture, think beyond the traditional desk and chair combo. Go for pieces that offer both form and function. A sleek, minimalist desk with clean lines can make a powerful statement. Add a comfortable yet stylish office chair that provides the necessary support for long working hours. Don’t underestimate the power of good lighting! Natural light is ideal, so position your desk near a window if possible. Complement this with a stylish table lamp or a trendy floor lamp for those late-night work sessions.

How to Choose the Right Paint Colors for Your Home

Choosing the right paint colors for your home can be an exciting yet daunting task. With countless shades and hues available, it’s easy to feel overwhelmed. But fear not! This guide will help you navigate the world of color and make confident choices to transform your living space into a personal sanctuary.

First, consider the purpose and atmosphere you want to create in each room. Different colors evoke distinct moods and emotions. For instance, warm tones like yellow and orange can energize and brighten up a space, making them excellent choices for kitchens and living areas. Cooler shades of blue and green, on the other hand, are known for their calming effects, perfect for bedrooms or bathrooms, where relaxation is key. Imagine the vibe you want each room to have and select colors that align with that vision.
##

Next, think about the lighting conditions of your home. Natural light can drastically impact how a paint color looks on the wall. A shade that appears bright in the store might turn out darker in a room with limited sunlight. Observe how light enters each room throughout the day and choose colors that complement the lighting conditions. Consider buying small paint samples and testing them on different walls to see how the color changes at various times of the day.

Another crucial aspect is color coordination and harmony. Unless you want a bold, contrasting effect, aim for a cohesive color scheme throughout your home. Choose a primary color palette and select shades that work well together. Monochromatic color schemes, using different tones of the same color, create a sense of flow from room to room. Alternatively, complementary colors, found opposite each other on the color wheel, can provide a vibrant yet balanced look.

10 Kitchen Upgrades You Can Do in a Weekend

Are you ready to give your kitchen a quick makeover without breaking the bank or spending months on renovations? These 10 simple kitchen upgrades can be tackled in just a weekend, adding functionality, style, and a fresh new look to the heart of your home. Whether you’re a seasoned DIY enthusiast or a novice, these projects will leave you with a sense of accomplishment and a kitchen you’ll love.

**Refresh Your Walls**
A new coat of paint can work wonders. Opt for a fresh, bright white or a trendy neutral shade to make your kitchen feel more spacious and clean. If you’re feeling adventurous, create an accent wall with a bold color or a unique pattern to add character. With the right paint and a bit of time, your kitchen can go from dull to dazzling.

**Update Your Backsplash**
Transform your kitchen instantly with a new backsplash. Peel and stick tiles are easy to install and come in various styles, from classic subway tiles to modern geometric patterns. This project requires minimal tools and can be completed in a few hours, but it will drastically enhance your kitchen’s visual appeal.

**Upgrade Your Cabinet Hardware**
Give your cabinets a facelift by replacing outdated hardware with stylish new pulls and knobs. This simple upgrade can modernize your kitchen and provide a more cohesive look. Explore various finishes and styles to find the perfect match for your taste and existing decor. It’s a small detail that will make a big difference.

**Install Under-Cabinet Lighting**
Brighten up your countertop workspace with under-cabinet lighting. This upgrade is not only practical but also adds a luxurious feel to your kitchen. LED strip lights are an affordable, energy-efficient option that is easy to install with adhesive backing, ensuring your weekend project doesn’t turn into a complex wiring job.

Stay tuned for part 2, where we’ll dive into more kitchen upgrades, including creative storage solutions and small updates with big impacts!

DIY Outdoor Projects to Upgrade Your Backyard

Are you ready to transform your backyard into a stunning outdoor oasis? It’s time to roll up your sleeves and get creative with some fun DIY projects that will elevate your outdoor space. Say goodbye to boring weekends and hello to a satisfying and cost-effective way to enhance your home. From cozy hangout spots to stylish upgrades, these projects will ensure your backyard becomes the envy of the neighborhood. So, let’s dive into some easy-to-tackle ideas that will make your outdoor dreams come true!

Creating a cozy seating area is a fantastic way to enhance your backyard’s appeal. Start by building a simple wooden deck or installing a patio. You can find easy-to-follow tutorials online for this process, ensuring your new hangout spot is both sturdy and stylish. Consider adding comfortable outdoor furniture, such as a sectional sofa or a hanging chair. To make it even cozier, hang string lights above the seating area, creating a magical ambiance for evening gatherings. Throw in some colorful cushions and a soft rug to complete the look and feel of an outdoor living room.

For those who love to entertain, an outdoor kitchen or bar area is a game-changer. Construct a simple countertop using weather-resistant materials, such as treated wood or stone. Install a small sink and a built-in barbecue grill to make cooking and entertaining a breeze. You can even add a mini-fridge and shelves to store your favorite drinks and snacks. This functional yet fun addition will make your backyard the go-to spot for summer parties and intimate gatherings.

Adding a water feature to your backyard creates a soothing atmosphere and provides a unique focal point. Building a small pond or installing a fountain is easier than you might think. You can find pre-made water features or kits that only require basic assembly skills. The gentle sound of running water will create a peaceful ambiance, allowing you to relax and unwind in your own personal sanctuary.

An outdoor movie night is a fun idea to enjoy your backyard with family and friends. Set up a projector and a simple screen on a wall or a large sheet. Add some cozy blankets and pillows on the ground, and you’ve got the perfect setup for a memorable movie experience under the stars. Don’t forget the snacks and drinks to complete this fun backyard transformation.

So, there you have it—a variety of DIY outdoor projects that will upgrade your backyard and create lasting memories. With a bit of effort and creativity, your outdoor space will become a beloved extension of your home. Happy crafting, and enjoy the fruits of your labor!

How to Make a Small Room Feel Bigger

Making a small room feel spacious and welcoming can be a fun design challenge. With a few clever tricks and strategic choices, you can transform any compact space into a cozy haven that exudes style and functionality. Here’s your go-to guide on creating the illusion of space and making the most of your small room.

**Play with Color and Light**

Color is a powerful tool in a designer’s kit. When dealing with a small room, opt for a light and neutral color palette. Soft shades of white, gray, or beige on the walls can instantly make the space feel more open and airy. These colors reflect light, creating a brighter and more expansive atmosphere. Avoid dark hues that can make the room feel enclosed. Natural light is your best friend; embrace it by using sheer curtains that let sunlight stream in, instantly brightening up the room.

**Mirror, Mirror on the Wall**

Mirrors are a classic decorator’s secret to creating the illusion of space. Strategically placing mirrors in a small room can reflect light and the surrounding area, giving the impression of depth. A large floor-length mirror can be a stunning statement piece, or you can opt for several smaller mirrors arranged in a collage-like fashion. This simple addition will make your room feel more expansive and add an element of visual interest.

**Furniture with a Purpose**

In a small room, every piece of furniture should earn its keep. Choose pieces that are proportionate to the space and serve multiple purposes. For instance, a storage ottoman can provide extra seating and a place to keep clutter out of sight. A foldable wall desk can offer a workspace without taking up valuable floor space. Look for furniture with clean lines and raised legs, as these designs create the perception of more space by allowing light to flow beneath them.

**Storage Solutions**

Clutter is a small space’s worst enemy. Implement innovative storage solutions to keep your room organized and visually appealing. Floating shelves are a fantastic way to display books and decor while keeping the floor clear. Under-bed storage boxes or lift-top storage benches can hide away items, keeping the room tidy and serene.